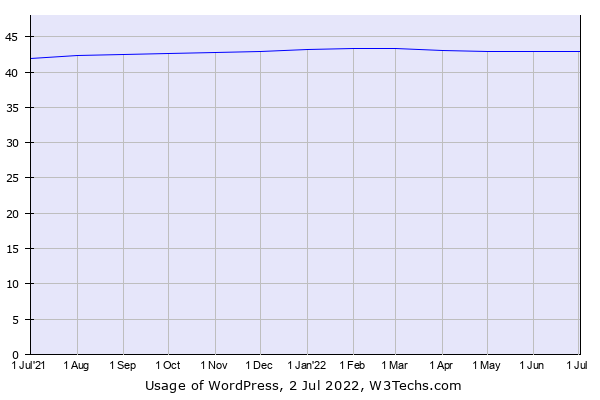
WordPress is the webs’ most popular CMS powering over 40% of the total amount of sites in the entire Internet. This guide will show you how to install WordPress on Ubuntu 22.04 with a LAMP stack.
How to Install WordPress on Ubuntu 22.04
Prerequisites
On this guide, we will already assume that you have done and have the following:
- Domain name
- VPS server – Visit VULTR (this site is powered by them)
- LAMP stack already installed (click here to view how to setup a LAMP stack)
- User with sudo privileges
Setup Apache Virtual Host
A virtual host is basically a single website, whether its a subdomain, or a regular domain, we will have to setup a virtual host for each. In this case we will setup a virtual host for WordPress installation.
To setup a new virtual host, let’s create a new configuration (.conf) file with the name of our domain name:
sudo nano /etc/apache2/sites-available/domain_name.confAnd paste the following, make sure to replace domain_name for your domain:
<VirtualHost *:80>

ServerAdmin admin@domain_name.com
ServerName domain_name.com
ServerAlias www.domain_name.com
DocumentRoot /var/www/domain_name.com/public_html

ErrorLog ${APACHE_LOG_DIR}/domain_name_error.log
CustomLog ${APACHE_LOG_DIR}/domain_name_access.log combined

</VirtualHost>
Then, let’s enable our newly created virtual host:
sudo a2ensite domain_name.confThen, reload apache:
systemctl reload apache2Now that we have setup our virtual host, we need to create the directory where our site files will be hosted at (DocumentRoot), which is the route specified on our virtual host configuration above:
sudo mkdir /var/www/domain_name.com

then

sudo mkdir /var/www/domain_name.com/public_html
Then, let’s give our newly created directories the right user group so that our web server (Apache) can read/write:
sudo chown -R www-data:www-data /var/www/domain_name.comThat’s it! We have successfully setup our Apache virtual host, and created the directory we will be extracting WordPress on!
Creating a new user and database
We will be creating a new database for our WordPress instance, first login to the MySQL server:
mysql -u root -pThen, create a new database (rename it if you’d like):
CREATE DATABASE wordpress;output
mysql> CREATE DATABASE wordpress;
Query OK, 1 row affected (0.00 sec)
mysql>
Then, let’s create a new user for our database, make sure to replace (bold blue text) the username, and password:
CREATE USER user@localhost IDENTIFIED BY 'Password123@';Assign the user to the database we created previously:
GRANT ALL PRIVILEGES ON wordpress.* TO user@localhost;Lastly, let’s flush privileges for the changes to take effect:
FLUSH PRIVILEGES;

then

exit;
That’s it! We have created a new database and have assigned an user to it!
Download, Extract, and Install WordPress
The last step is to download, extract it and Install WordPress.
Let’s navigate to the DocumentRoot or public_html folder we created earlier
cd /var/www/domain_name.com/public_htmlDownload
Let’s use the wget command to download the latest version of WordPress:
wget https://wordpress.org/latest.zipUnzip and move
Unzip the archive:
sudo unzip latest.zipBecause of how the archive was compressed, all the WordPress files are within a wordpress directory. Let’s move all the contents of that directory over to the root of the public_html directory: (make sure you are located inside the public_html directory)
sudo mv wordpress/* .Install
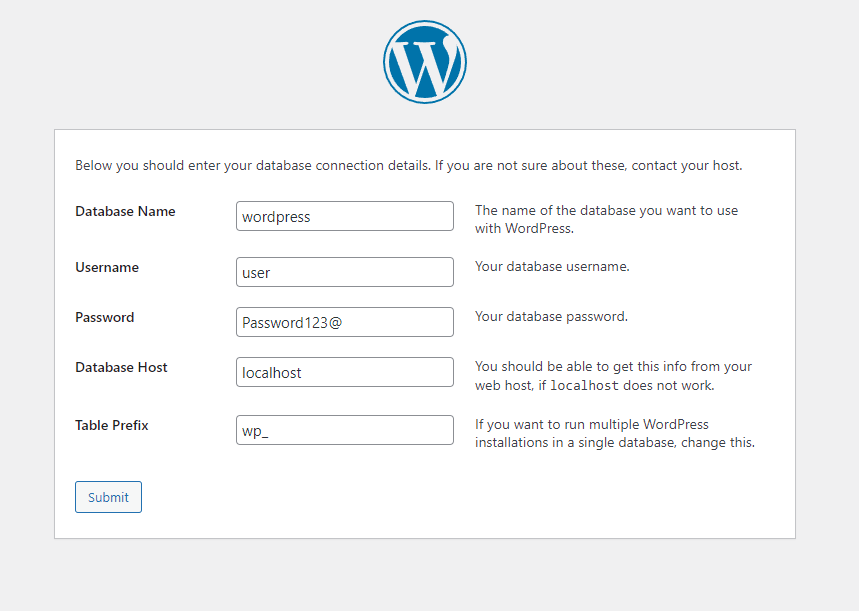
The last part is to navigate to our site, and follow the instructions. You’ll be asked to input your database name, database user, and password.

Then you’ll be followed by another page to create your administrator account, among a few other options. Once you have input everything you will be taken to the login page to login to the wp-admin zone.
Summary
This guide hopefully helped you to install WordPress on Ubuntu 22.04 with the LAMP stack.
